Creating an ODBC Dataset in Visual Studio 2012
There are still times when the database provider that needs to be incorporated into an application does not provide any driver other than ODBC. Or it may be that ODBC has been the channel used for the last several years, and so we know that the configuration of the connection will not be an issued. For those times, Visual Studio 2012 can be used to create a Dataset based on an ODBC connection. To demonstrate this, I will create a new Windows Forms application and add the dataset.
1. Create a Windows Forms Application in Visual Studio 2012.
2. Select the View menu select Other Windows and choose Data Sources.
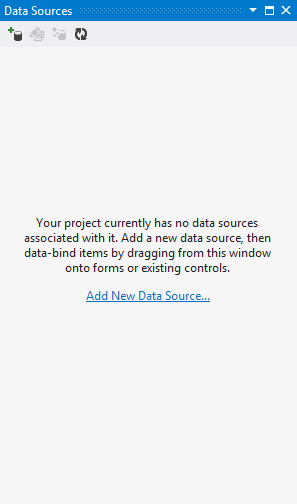
3. In the Data Sources window click on the link to Add New Data Source… to start the Data Source Configuration Wizard
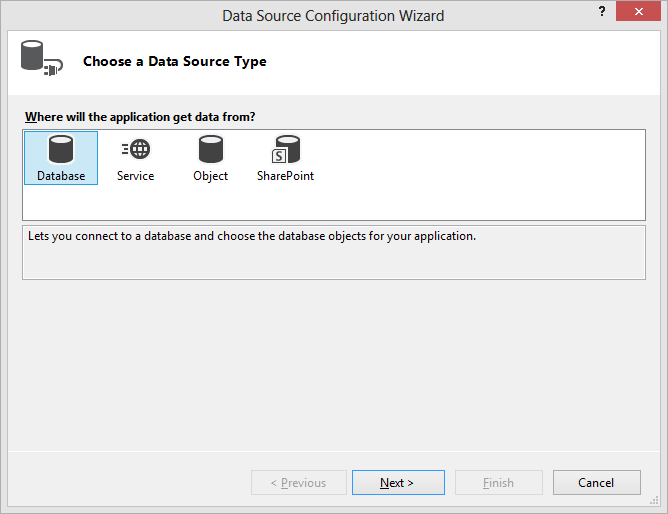
4. To create a data set from an ODBC database connection choose Database and proceed to the next step.
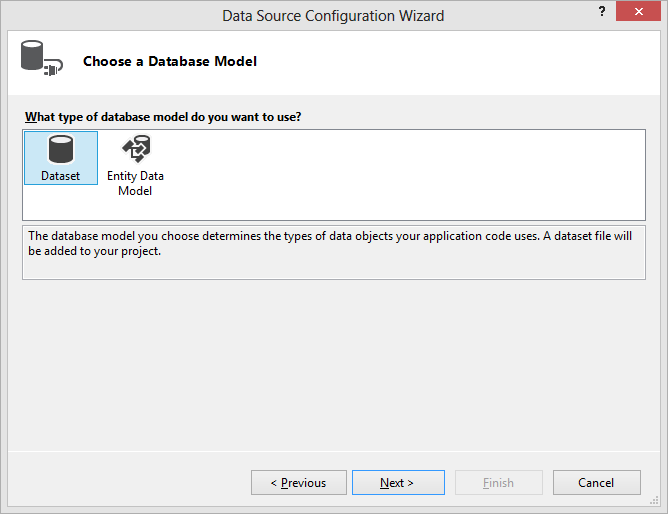
5. We are looking to create a Dataset so choose that option. On the next page choose New Connection… to open the Add Connection dialog.
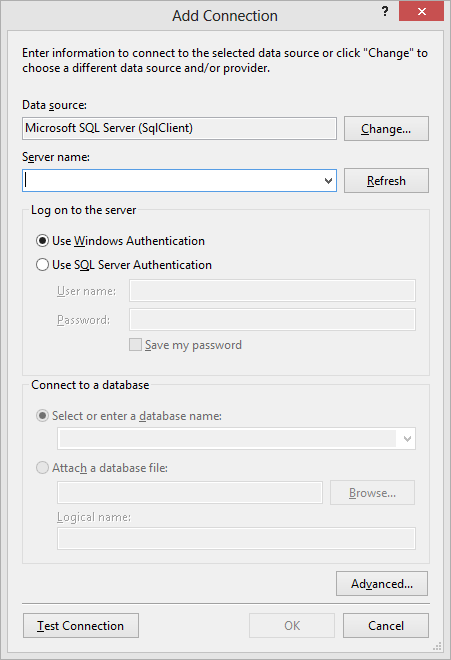
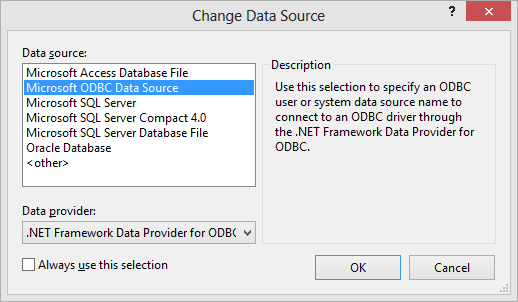
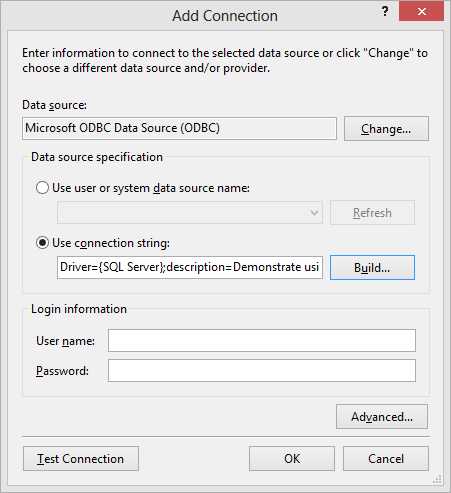
6. Click the Change button next to the Data source textbox and change the selection to Microsoft ODBC Data Source. When you click OK the Add Connection dialog appears.
7. If an appropriate user or system data source name (DSN) has already be created on the system, it can be chosen from the drop down.
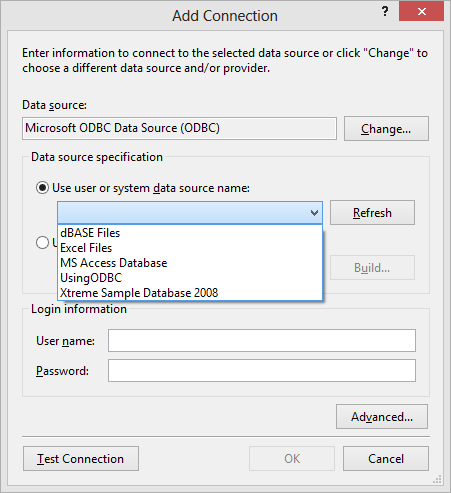
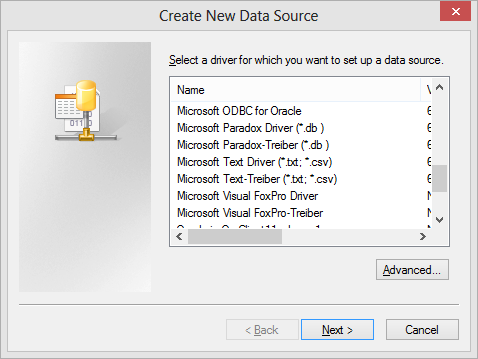
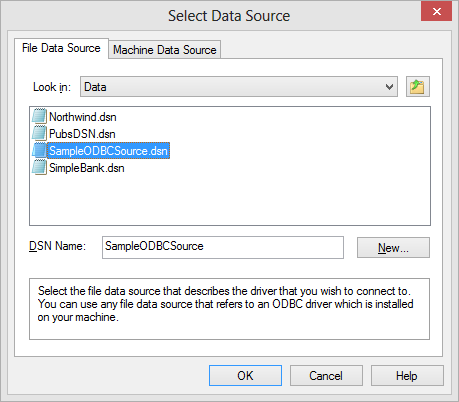
8. Otherwise select Use connection string and click Build… to open the Select Data Source dialog.
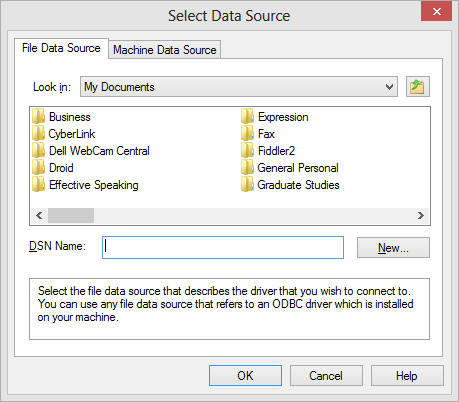
9. Click New… to open the Create New Data Source dialog.
10. Choose the database type as appropriate and click Next to provide the location where the Data Source Name file will be stored. One more Next and a Finish will create the file, and start the dialog for the database type. This dialog will vary depending upon the needs of the chosen database type. Once this dialog is completed a file DSN will be presented in the Select Data Source dialog.
11. Choose the new DSN and select OK. (You may be asked to login, depending on the database security settings.)
12. If you wish to test the settings the Test Connection button is available, and when you click OK the new data connection will be selected in the wizard.
13. Next will display the available database items to choose for the dataset.
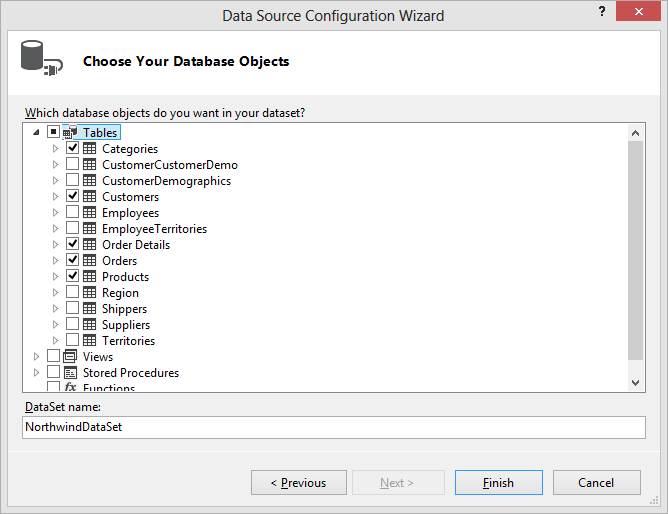
14. Click on the check boxes to select those items that you wish to include and click Finish.
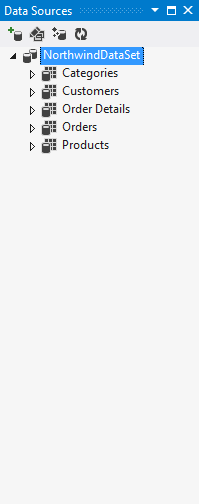
15. The Data Sources window will now show the items that have been modeled into the application.
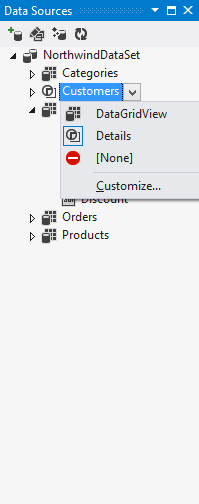
16. Clicking on the triangle next to an item will expand it and clicking on the dropdown for an item will allow selecting how it should be displayed in the form when it is dragged onto the designer.
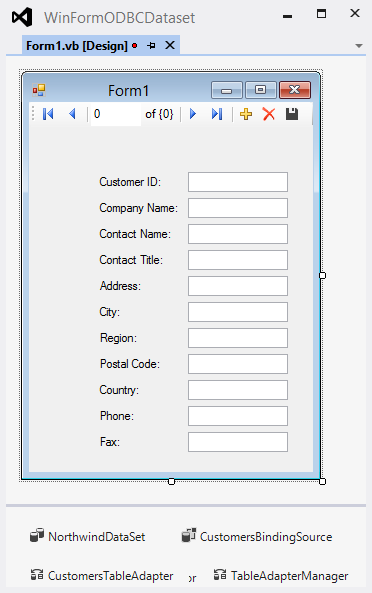
17. For example setting Customers to Details and dragging it onto the form creates a form with its associated DataSet, BindingSource, TableAdapter and AdapterManager components.
In my next installment, we will drill down into the xsd dataset files to see just what the dataset is made of.